ASP.NET Core on DigitalOcean Jumpstart

There is decent amount of documentation on how to install, configure and run .NET Core on Linux, but most of it pretty generic and may be a little overwhelming when you trying to accomplish specific and relatively simple task. So I decided to put this together in case I need to go over it again or maybe someone else can use it. This not by any means an extensive tutorial on how to setup things in production secure environment, it is how to get you started quickly and (relatively) easily so you won't drop it discouraged and frustrated half way through.
Your DigitalOcean account
I"m using DigitalOcean here as example, but obviously this can be any Linux based hosting. Get your hosting account, in my case I got cheapest "droplet" available running Ubuntu 18.04 ($5 monthly). Once you'll get this, host should provide info on how to connect to your server remotely, usually using SSH. To make things simpler, I run Linux subsystem on my Windows machine so I can use "Bash on Ubuntu" utility and run SSH command straight from there.
Installing .NET Core
Microsoft likes to change links, so this may on may not work, but you can go to this tutorial, select your OS and run through it all the way, installing latest version of .NET Core and testing it with "hello world" console application. Make sure you can run it and all works fine.
Installing SQLite (optionally)
Because my web application requires SQLite database, I'm also installing it here.
sudo apt-get update
sudo apt-get install sqlite3 libsqlite3-dev
Testing your app locally
Publish your ASP.NET Core application to local folder, so you can run it locally before deployment and verify it works correctly from command line. In Visual Studio, you simply select your app in solution explorer, right-click and publish to folded. When done, open command line terminal (CMD utility) and navigate to that folder. Given my application name is "App" and it compiled into "App.dll" this will look like:
dotnet App.dll
This should start application running and you should be able open web browser and navigate to http://localhost:5000. If your app runs and looks right, congrats - you ready to deploy it to remote host server!
Deployment
Filezilla is still the best FTP client for me, but you can use whatever you want - create new folder in your host server, I used "blog", and copy all files from your local published directory to your server. For ASP.NET Core important thing is, your published directory must include refs and runtimes folders. So somewhat like this:
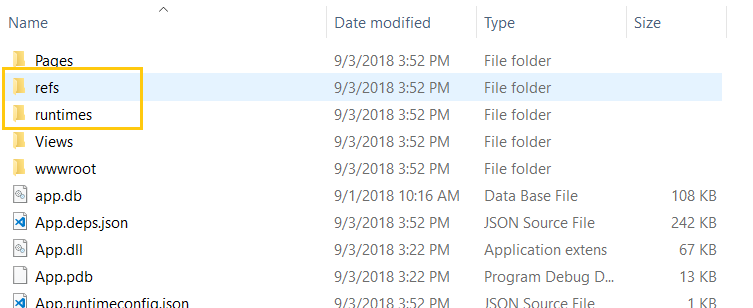
(you may not have other folders, like "views", if you choose to pre-compile app on publish, but I personally like to have them)
Testing remote app
Now we want to test remote app just as we did locally, to make sure it works fine on your host server. So back to command line, remote to server and go to your app directory, for me it is cd blog. Run app:
dotnet App.dll
Again, you should see familiar trace and app should start and run on port 5000. But if you go to web browser and navigate to it using http://<your.ip>:5000 you won't see it - your server is not set for it just yet. So to verify it is really working and serving pages, you can request page locally - open another remote terminal and run this command:
curl http://locahost:5000
If you see HTML output in the terminal screen, your app is working properly. It is just not available for outside world yet. Moving on.
Installing Nginx
To access our web application we need to run a web server, Nginx is a good candidate for the job. Installing it simple:
sudo -s
nginx=stable
add-apt-repository ppa:nginx/$nginx
apt-get update
apt-get install nginx
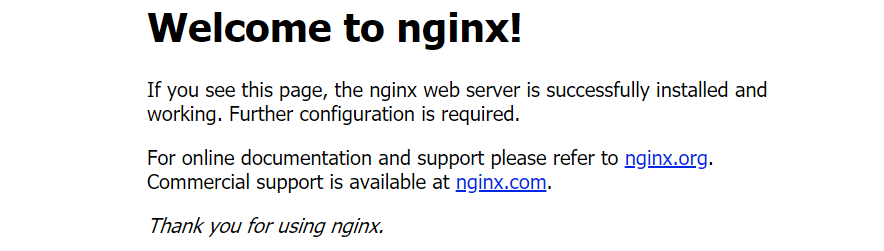
To verify install:
nginx start
http://<your.ip.here>/index.nginx-debian.html
And you should see welcome screen:
Almost there! Now we need to tell Nginx to run our application. For that, we need to edit configuration file.
nano /etc/nginx/sites-available/default
The end result for edited file should look similar to this:
server {
    listen 80;
    location / {
        proxy_pass http://localhost:5000;
        proxy_http_version 1.1;
        proxy_set_header Upgrade $http_upgrade;
        proxy_set_header Connection keep-alive;
        proxy_set_header Host $host;
        proxy_cache_bypass $http_upgrade;
    }
}
This basically telling Nginx to use your application running on port 5000 as web root, and you finally can go in the browser to your server's address (http://<your.ip.here>) and see application in all glory.
Run as a Service
Now it all works, but starting application from command line every time is annoying at best. To make is start automatically it has to run as Linux service. First thing is to create service - fortunately, this as simple as creating a text file in specific directory.
cd /etc/systemd/system
sudo nano blog.service
This opens up text editor, here is content I used for my blog app:
[Unit]
Description=Blog Application

[Service]
WorkingDirectory=/root/blog
ExecStart=/usr/bin/dotnet /root/blog/App.dll
Restart=always
RestartSec=10
SyslogIdentifier=blog
User=root
Environment=ASPNETCORE_ENVIRONMENT=Production

[Install]
WantedBy=multi-user.target
Save this, and now to test whole thing with DigitalOcean I enable service and then just go and reboot:
systemctl enable blog.service
reboot
When server comes live, I should just navigate to my site in web browser and, if all works fine, it'll just load. That's quick and dirty and this is all for now.