Export Existing BlogEngine Comments Into Disqus

 For some time now BlogEngine supports multiple commenting systems, from built-in to 3rd party, like Facebook or Disqus. Switching from one to another is as simple as selecting an option in the admin. The catch is, if you have existing comments and want to bring them over - you on your own. Here I'll cover relatively painless process exporting your comments into popular Disqus commenting system.
Full discloser - I do not necessarily recommend moving your comments to Disqus, personally I'm doing it for my own reasons. Internal BlogEngine comments work just fine. Using Disqus would help to unload your blog when you have tons of visitors and it starts to impact performance, I suppose. But it also can potentially bite you down the road, for example you might as well run into limitations on comment traffic in Disqus or they can make it paid for, annoy you with ads or something else to degrade experience. Right now they doing pretty good job, but you never know, so don't tell I haven't warned.
If you still want to take a plunge, here is how you do it.
Creating Disqus Account
Head over to https://disqus.com and create new account if you don't have one. Once you have an account, you can add sites to this account It has to be publicly available over web, not local, and unique within Disqus. For example I could add "rturnet" as site name and provide "http://rtur.net/blog" as site URL.
Exporting from BlogEngine
Navigate to admin panel in BlogEngine and load advanced settings (admin/#/settings/advanced). Click "Export" button and save generated file, by default BlogML.xml. This file is in BlogML format, and Disqus can only read its own custom format, so we need to convert BlogML to Disqus import file. This console application can do conversion or use this compiled executable (blogml2wp.zip) if you don't want to deal with Visual Studio and source code. Once you have BlogML.Output.xml you ready to load your BlogEngine comments into Disqus.
Importing Into Disqus
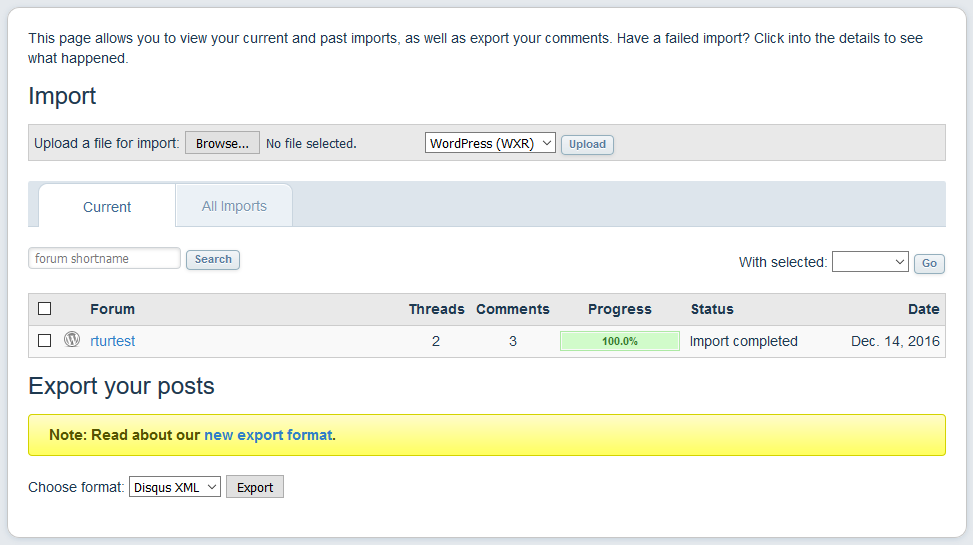
Importing into Disqus is pretty simple, navigate to https://import.disqus.com, select your "forum" (site you created in the first step). Upload your BlogML.Output.xml using provided form and wait a little for the file to be processed. Here is screen after loading small test file with 2 posts and 3 comments.

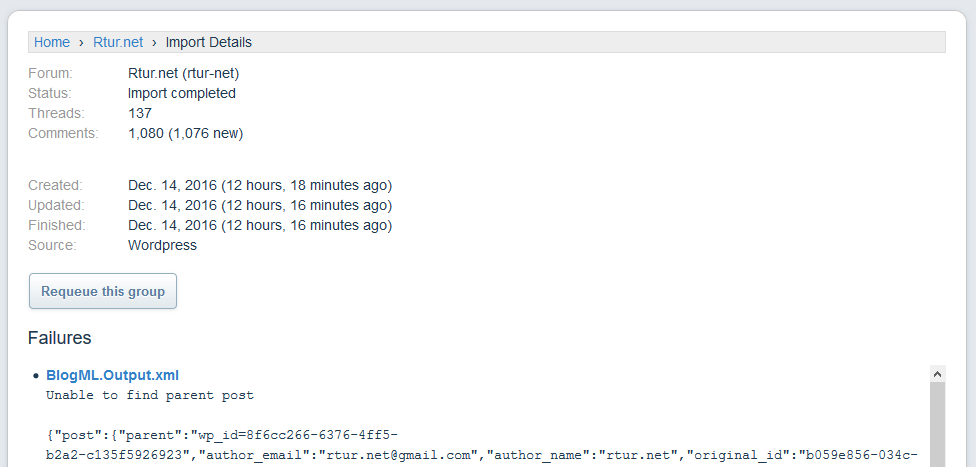
If you click "forum" name in this screen, you'll see details page. This details page will also show any export errors, if any. In my case, after loading over 1,000 comments I had 4 old comments having export errors which I safely ignored.

All threads should be added to Disqus admin and imported comments should appear in the moderated list. At this point, you ready to connect Disqus with BlogEngine.
Switching BlogEngine to use Disqus
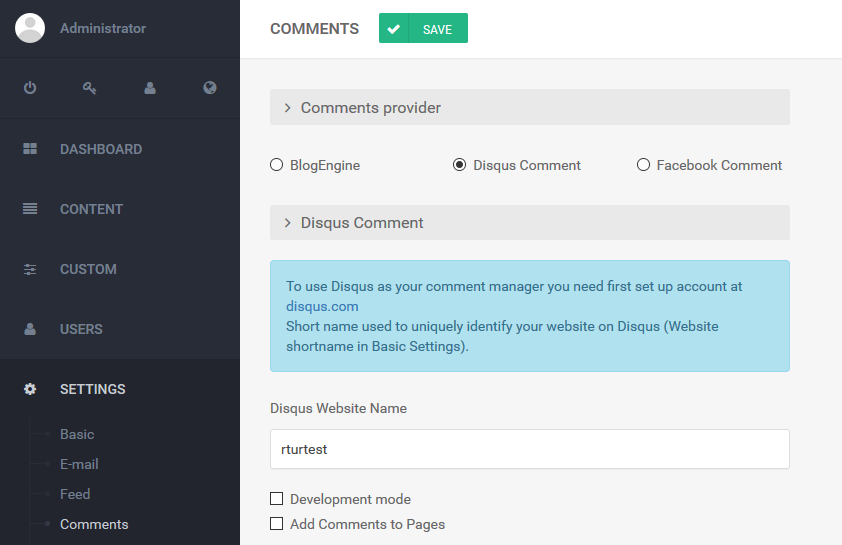
In the BlogEngine admin panel, go to settings/comments and select Disqus as your comment provider, enter site name and save changes.

You should be done by now, but I found one small issue I had to resolve for Disqus comments to show on the site. I'm using latest BlogEngine with URL slug instead of post ID. So I had to modify Disqus URL in my blog to use absolute link instead of permalink. You'll have to FTP to your site and make an edit in /post.aspx.

That is it, your site should be using Disqus instead of built-in comments now. You can delete your internal comments if you want to or keep them around just in case. They will not interfere and will be ignored as long as you using Disqus as your comment provider.
Enjoy!


