Hosting BlogEngine.NET 2.0 on GoDaddy

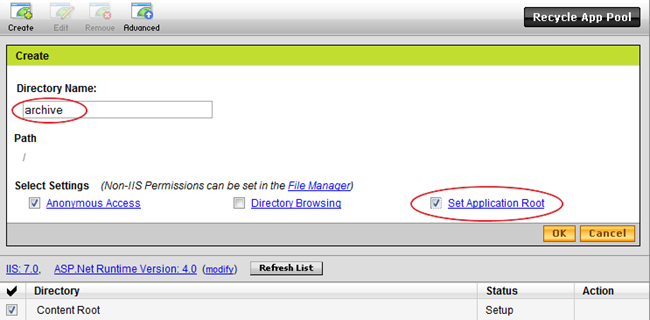
 Go to hosting dashboard/content/IIS management and click “create” link. This is an interface GoDaddy provides you to create virtual directory for your ASP.NET application. Give a name for directory and don’t forget to check “set application root” – this is akin to “configure virtual directory as application” in IIS world, and this is exactly what we doing - installing ASP.NET application.
Once you click ok, GoDaddy will initiate setup process that will take usually under 30 minutes to complete.
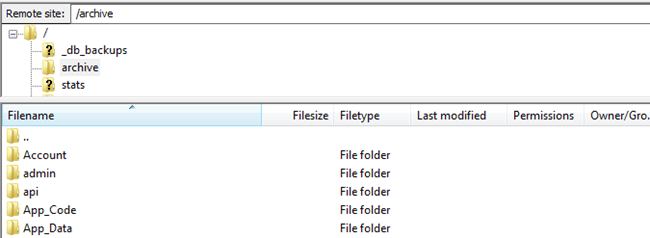
After process completed, we ready to move application files to the server. You can use Filezilla or any other FTP client, information on FTP access emailed to site owners by GoDaddy support when you set up an account. You should upload all files from website’s project directory, usually “BlogEngine.NET”, with exception of “setup” folder. When upload done, close FTP client – no need to use it anymore for this task.
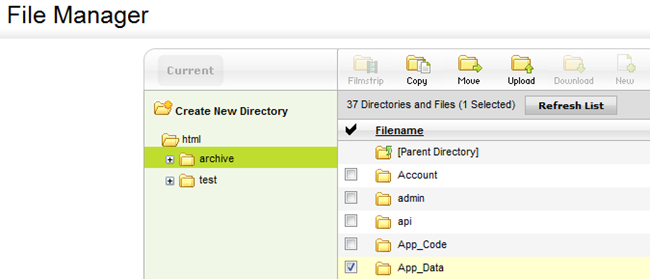
Now navigate to file manager in GoDaddy’s control panel, check App_Data folder and click “permissions” button in the toolbar.
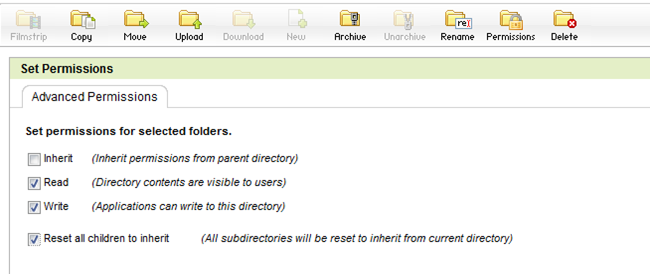
Set App_Data permissions as shown below, giving write access to App_Data and all subfolders.
You all set and should be able navigate to newly created website and make any updates to the content. By default, BlogEngine uses XML data provider that stores all information it App_Data folder. If you want to use database instead, here is how to switch to DB provider.
Using DB provider
You usually have MS SQL Server and MySQL as your choices for most hosting plans on GoDaddy. SQL Server a little easier to setup and configure. Go to hosting dashboard/databases and select SQL Server. Create new database, providing DB admin/user names and passwords. When database created (pending approval…) you will be able see DB information clicking edit/view action button in the DB list.
Click “manage via web admin” link in DB list, login to database and click “query analyzer” in the tools section. Here you can run SQL queries that will create and populate tables for your blog. Copy/paste those queries from the setup/SQLServer/MSSQLSetup2.0.0.0.sql, then hit “execute” and all should run with no errors.
Copy content of the “setup/SQLServer/SQLServerWeb.Config” file and paste it into Web.Config, replacing all. Locate “connectionString” and replace values for data source (host name), user id (user name), password and initial catalog (database name).
There – save, reload and you should see welcome post:


