How to convert theme to BlogEngine.NET part 4

In this part we'll get menu working. BlogEngine supports “pages” – pages are different in that they don’t belong to post list, don’t support comments and can have parent/child relationship. In short, this is a way to turn your blog into CMS (content management system) or combine blog and CMS on the same site. BlogEngine has page list widget that shows list of all pages on the site. It is a simple flat list and does not support nesting, that is why a while back I wrote this control to extend standard list to hierarchical unsorted HTML list that can be styled with CSS to look as horizontal or vertical menu usually used in CMS-style websites.
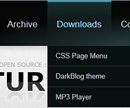
Adding horizontal CSS menu
Boldy has dropdown menu on top, it actually uses Dynamic Drive’s smooth navigation menu – which is perfect, because I can use my old menu control to generate unsorted list and take CSS and JavaScript that came with Boldy pretty much unchanged. Steps I went through:
- Compared HTML generated by my page menu control with one required by smooth navigation menu. Needed just remove “span” inside link to get it matched.
- Added blog:PageMenu control to the site.master and added reference to CSS style that Boldy uses to style the menu.
- With JavaScript it is a little trickier, you can’t reference script inside your theme because BlogEngine uses HTTP handler to compress and validate JavaScript and your reference will be ignored. To get around, you’d have to either add inline script or use extension to inject reference into the header at runtime. However, the easiest way is to add this reference in the admin/settings/tracking script, and that’s what I did. It will make script site-wide, but if you only using one theme it does not matter and it is small overhead even if you switch to the another theme and forget to remove it later on.
- I trigger JavaScript in the body-on-load and added small function to the script that I call from body load event.
- Added login link to the menu.
That is it. To summarize, control generates UL, it is styled with style that came with Boldy and sliding effect provided by JavaScript that also came with Boldy, pretty simple.
PageMenu control is very basic, it adds home/archive items in the beginning and contact/logoff in the end. If you want to remove, add or modify any of those, you need to open control’s file in the text editor (/app_code/controls/PageMenu.cs) and remove or comment out some code. Fore example, removing this line will get rid of “Contact” item in the menu:
AddMenuItem(ul, Resources.labels.contact, "~/contact.aspx");
To install or update theme:
- Copy “Bodly” folder into /themes folder
- Copy PageMenu.cs into /app_code/controls folder
- Add script reference (below) to the admin/settings/tracking scripts
<script type="text/javascript" defer="defer" src="/blog/js.axd?path=/blog/themes/Boldy/js/ddsmoothmenu.js"></script>
You have to modify path in that script to match your site. If it is in the root, it will be just /js.axd?… etc.
Login links pointed to /account/login.aspx - you might need to change it to /login.aspx for your version, it moved to "account" only recently.